Penn and Cord's Garden
  • Home
  • Penn's Blog
  • Classes/Consultations
  • Greenhouses
    • Order Greenhouse Plans!
    • Latest Greenhouses
    • Student Greenhouse Projects
    • Colorado College Greenhouse
  • Miss Penn's Mountain Seeds
    • More Wild Mountain Seed
    • Seed Saving
  • Contact Us
    • Newsletter
    • The Cool List >
      • The Book List
      • Penn's Tomato Critique
    • About Us
  • Store
  • Letter of Agreement

Winter Greenhouse Salad

12/29/2011

6 Comments

 
Picture
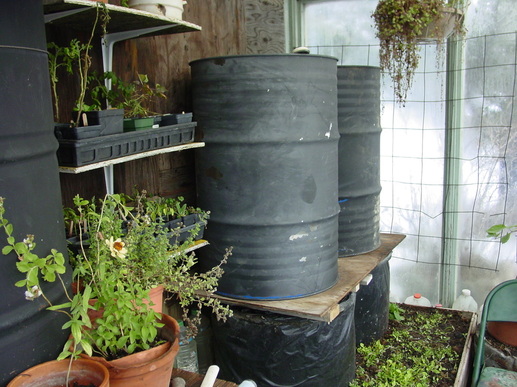
The view from the chair in my greenhouse.
Picture
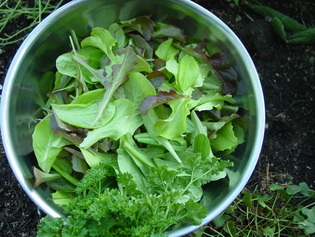
Freshly cut greens with parsley too.

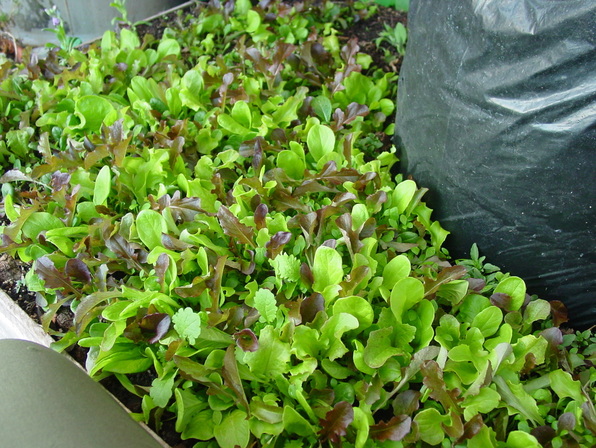
That's my knee in the pic above - my favorite spot for admiring the food.  I have been watching and waiting for these broadcast mixed greens to get to this point, so today I ran to get my scissors to help make it easy and quick.

I know that salad greens are pretty common in the winter greenhouse but how long I've been without them is not common.  Luckily they grow fast and tonight I cut a lush batch for dinner - they were well worth the wait.  


I always submerge my greens in water - it gets them much cleaner than just rinsing them.  So I do both - into a bowl of cold water they go to lift the dirt up and out of the crevices but then a final rinse is in order before they go into the salad spinner.  After they are dry, I put them in a produce bag and refrigerate them before dinner - they are crispy cold and so yummy by the time the meal is done.
The bed of greens above will soon overtake my ability to keep up with it.  You wait and wait, and once you cut your first batch of cut-and-come-again greens they just seem to explode, hurrying to replace themselves.
I hand picked some and then cut with a sharp scissors, I just gather up a handful and carefully cut well above the crown, to allow new growth.  It's hard to tell I cut at all in the picture below but I'm adding it so you can see how little it takes to cut a salad bowl full.
Picture
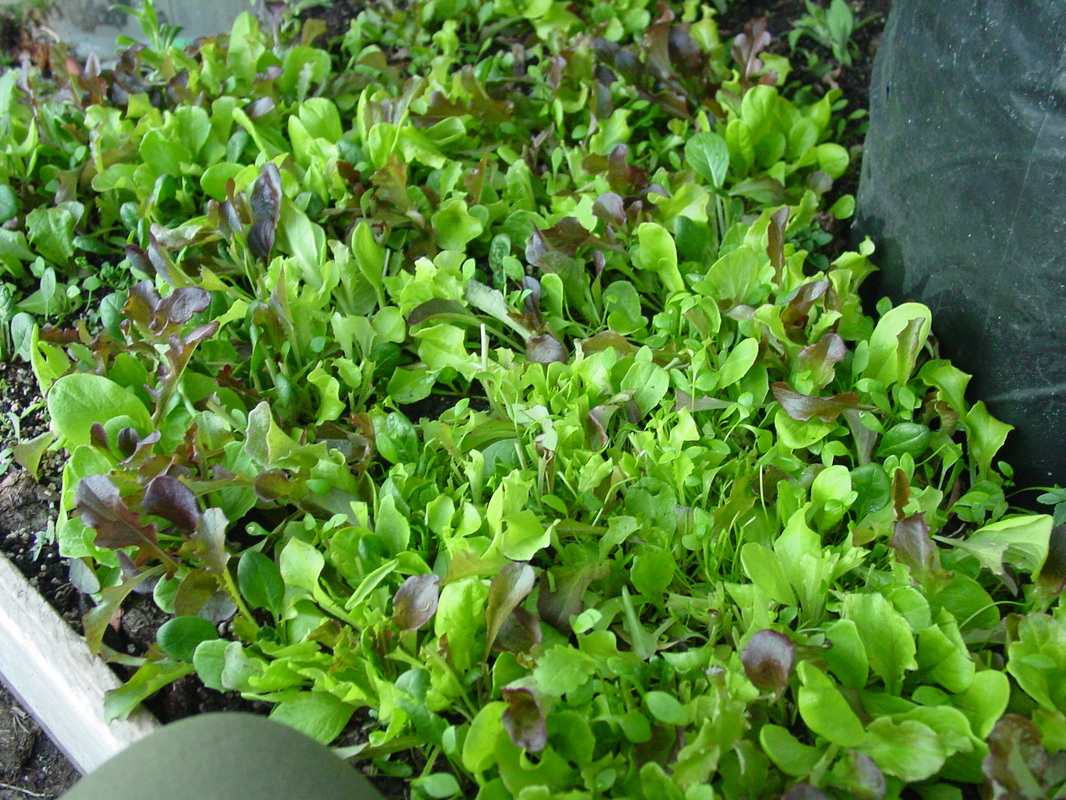
The view from my chair after I cut.
I've long made my own Mesclun mixes (Mesclun simply means 'mixture'), and this one is particularly mild and succulent.  I often jazz it up with hot and spicy greens but this batch wanted to be mild.  There is a mixture of can't-beat lettuces, but also lots of Claytonia - or Miner's Lettuce, a delicious wild thing that is so plump and sweet I can't stand it.  I also included good old meaty-yummy spinach, some lovely endive and a little Mache or Corn Salad.  The lettuces include Red Saladbowl, Marvel of Four Seasons, Winter Density Romaine, Drunken Woman Frizzy-Headed, Australian Yellow and Merlot.
Make your own - it's fun and unique.  If you have a lot of almost finished lettuce packets, mix them all up and broadcast them for fast salad greens.  You can do this in all kinds of containers you have in the garage, empty window boxes, Petunia hanging baskets, pretty bowls, whatever, you can grow salad greens in a 5-gallon bucket if you want.  I like to grow a colorful mix of greens in a pretty bowl and set it on the table - go ahead and graze right there.
Don't forget to include herbs too - I especially like Cilantro, Chervil or Chives in the salad mix.
6 Comments

Passive Solar Greenhouse Upgrade

12/12/2011

11 Comments

 
Picture
Syphoning water out of the old barrels.
Picture
55-gallon drums are bigger, better batteries.
The last two days I have been upgrading my greenhouse - well, me and Beau and Cord of course - who are always helping me do hard stuff.  It has been long overdo to switch out two 30 gallon plastic trash cans full of stored water to two 55 gallon steel drums full of stored water - thereby upping my little greenhouse's ability to heat and cool itself - once again.
I used the latest freeze to get busy.  In the fall I bring in a bunch of warm weather loving plants - into my cool winter greenhouse to keep them as long as I can.  Sometime in December they finally freeze - a few at a time.  Another round of tomatoes, basils, nasturtiums and flowers bit the dust with the last deep freeze leaving all my herbs, greens, perennials, and cool loving flowers a little more room.  It was time to send them out to the compost to make a contribution there.  
Beau helped me carry out the heavy pots and planters, stacking them by the compost bins.  After I got all of the plants off of the trash cans, he helped me to syphon the water out into the garden.  After valiantly sucking on the hose to get the water flowing, and trying two different length hoses, I decided once again that it would be prudent to ask Cord, who usually knows how to do everything around here.  And so I did - and he did.  "Fill the hose with water - both of you hold each end up in the air and pour water into it.  At the same time, put one end in the barrel and lay the other down - it should work without sucking on it."  Good grief - that was easy and it worked so well - it created a little whirlpool and made a sucking noise when it was done.  It was easy to lift the almost empty trash barrels out.
After they were out, I removed the board they were sitting on and noticed how crooked one of the bottom barrels had become.  It would have to be leveled.  But for the moment, I decided the old board needed a chance to dry out so I set it outside in the sun.  I waited until today to put the new barrels in as the day was running away from me.
This morning Cord was barely done yawning awake when I sat up and said, "I need your advice in the greenhouse - could you come up there with coffee?"  And so we went, in our bathrobes, with coffee in hand and sat amongst the greenery.  
Cord made a plan for spacers and surveyed a broken board on one of my beds.  Later in the day he came with a level, some boards and spacers, and a screw gun.  Before long, it was done, he had even lifted the empty iron drums into place.  The board was reinforced and it was up to me to fill the barrels.  
I watered the whole place and filled the barrels with the afternoon sun hitting them.  I closed it up looking forward to another change in my little greenhouse.  
New salad greens are jumping upward, daring me to pluck them and lots of herbs and flowers still abound.  
In the days to come I will plant in some leeks, parsley and lots of seed like Bok Choy, Chinese Cabbage, cilantro, lettuces, and root veggies. 
I love it in there with snow all around - it's especially warm and moist right now - and smells so good in winter.  Soon I will be bringing in some compost to prep the planting beds.  More on that soon.  
Picture
Here is the example of old leftover tomatoes with one showing off in the back on the left.  All of them in the flat froze - except 3 - this one stood out as the best - Mother Russia!  Another variety that survived death all around was Arkansas Traveler - seed from desert seedsman ThunderfooT. There were three Reisenstraubs in a row - two lived, the one in the middle froze. Sometimes I think I keep leftover tomatoes just to see who is the last plant standing.

Picture


This is what a newly frozen Nasturtium looks like - the morning after.  I see it as compost material for the green layer.  This is part of the ebb and flow of a cool winter greenhouse - as some plants phase out, new ones can be planted.  Much room has been made for me by nature -  to plant again!  Yippee!

11 Comments

Pumpkin Pie From Scratch

12/4/2011

1 Comment

 
Picture
Pumpkin Pie - loved by all around here.  We love pumpkin anyway - but I must say, when Cord roasts it with a chicken - it is to die for.  But for now - the best pumpkin pie ever is from a pumpkin you grew yourself - especially at 8,000 ft in the mountains.  So that's the criteria - a homegrown pumpkin or two, roasted with love and puree'd into rich, thick goodness.
Picture
Cut them in half at the equator and scoop out the seeds.


These beauties are Northern Bush Pumpkins - a late crop grown in the open.  Look at the thick wall - lots of meat!


Picture


Roast them until they are soft - they will be nice and puffy when you take them out - so
 I poke one with a knife to be sure and then let them cool and shrink.  
I like them face down to get caramelization - excellent flavor.  I used parchment paper - sometimes just a little oil but the clean-up is easier this way.  

Picture


Scrape the yummy cooked flesh into a bowl with a spoon.  You'll know if you cooked it long enough - it comes off easily.  It's harder to remove when it's undercooked.

I scrape it all out at once, then get out the food processor.

Picture


Thick, fluffy and full of roasted flavor, this puree will make a better pie!
 

Picture


This recipe calls for 3 cups of puree - more than most - which is why I always use it.  My only note is that it makes almost enough for two pies but way too much for one - and the recipe calls for one.  I think the fresh puree has more water in it and it expands the recipe.  So either make two sort of lean pies, or one big plump sucker and use the rest in a smaller dish.  You'll love the flavor - no matter what.

Picture
One cooled, one hot and two jars of puree for the freezer.
Here is a recipe to die for.  Grow your own Pumpkins!  Don't forget to roast them and freeze the puree for pies anytime.  The guys like pumpkin bread and cookies too.

Homemade Pumpkin Pie

Pastry for a Single Crust Pie
1 1/4 cups all-purpose flour
1/2 tsp. salt
1/3 cup butter or coconut oil
3-5 Tbs. cold water

In a food processor combine flour, salt and cold butter or coconut oil cut into chunks.  Pulse several times until it is like crumbly cornmeal.
Add tablespoons of water gradually until the dough forms and becomes a ball - it happens quick - don't add all the water at once.
Flour a board and roll out a circle.  
Fold it in half and lift it onto the pie dish.  

Unfold it into place and flute the edge.

3 cups pumpkin or winter squash puree
3 Tbs. sugar
3 Tbs. brown sugar
2 Tbs. Molasses
1/2 tsp. cloves
1/2 tsp. allspice
1 1/2 - 2 tsp. cinnamon
1 1/2 - 2 tsp. powdered ginger
1/2 tsp. salt
2 eggs, beaten
1 1/2 cups evaporated milk 
Mix everything together in a large bowl, pour into pie shell.

Bake at 375 degrees for the first ten minutes, then 350 degrees for the next 40 or so or until the middle sets.
Cool completely before cutting. 
Serve with whipped cream and or vanilla ice cream.
1 Comment

The Iron Man and the Sunflower Gate

12/1/2011

31 Comments

 
Picture
Things like this happen in my world a lot.  Some crazy beautiful piece of iron is completed and gone in a day or two - installed at it's final resting place with us left a little homesick for it.  We live through the birth and creation of Cord's work starting with a pencil drawing.  By the time it's grown wings to fly, we are in love.  We wanna keep it.  But there are anxious clients waiting.  And so it goes, installed just the other night right as it got dark.  
Cord and Beau took it to the homeowners and installed it together.  These particular clients are a joy to work for as they love Cord's iron and give him lots of artistic freedom.  He is a Master Blacksmith after all - this is what he does for a living.
So I caught this picture of him painting the highlights with his fingers - he definitely gets to know each piece.  
He highlighted it with a bronze color on the sunflower and a silver color on the frame.  It just jumped to life.  
The sunflower pieces were quite difficult to land but as you can see - they are weaved together and riveted. Rivets can really bring something together in a most artistic way.  It's the kind of piece you look at and look at to try to figure out how he did that!
I claim to be Cord's biggest fan - I know what he can do - I even know what he can do that he hasn't done yet - his own masterpieces.  
This is a beautiful glimpse at his fluid lines, his love of nature and even an ability to keep any sized dog in or out!  What a wonderful way to go.
Here it is installed - with a flash - in the dark!  
That would look great in MY garden!
Check Cord out at www.theironmancord.com

Picture
Sunflower gate near Westcliffe, Colorado.
31 Comments

Venison Stroganoff Thanksgiving

12/1/2011

6 Comments

 
When I asked my mother what she wanted to do for Thanksgiving she made it clear she wasn't interested in a turkey. It didn't take long to figure out what she wanted.  After putting up 5 deer this year I suggested Venison Stroganoff, "I happen to know an excellent recipe."  I knew she laughed when she read the email because the recipe is hers.  As all good recipes do - it comes with a story.  
When my parents were first married, back in the 40's, they relied on Venison a lot to stay fed.  That particular night my mom had made Venison Stroganoff when they got a call that my grandparents were about to visit and stay for dinner. "What are we going to do?", my mother asked, knowing full well that my grandmother did not eat venison.  My Dad quickly decided, "We're not going to tell her!"  And so they served it up - with hearts pounding I'm sure as my grandmother was famous for holding a grudge.  
My grandmother loved the meal so much she asked for the recipe.  My mother gave it to her, calling for beef instead with venison as a suggested substitute.
The next time they saw each other my Grandmother complained, "I made that Stroganoff but it just wasn't as good as yours!"  Of course she was never told and it never was as good as when you use venison.
I shall include the original recipe even though I make it differently now and always in huge quantities - mine is the stove top version too - so I include options.  No matter what, the classic ingredients are what makes it such a wonderful comfort food. This is always served over Kluski noodles.
From a Wisconsin Church Recipe Book - as is - omitting only the Kitchen Bouquet!!

Venison Stroganoff
1/3 cup butter
1 cup chopped onion
1 tsp. minced garlic
2 cans (4-6 oz.) mushrooms, stems and pieces
2 lb. beef or venison - cut into bite sized pieces
3/4 tsp. salt
3 TBSP flour
1 can 101/2 oz. beef boullion
1 cup dairy sour cream
2 tsp. Worcestershire Sauce

Melt 2 Tbsp butter in skillet, add onions, garlic and mushrooms, cook until soft.
Melt remaining butter in a lg. skillet, add meat, sprinkle with salt and brown lightly, put into a 2 qt. casserole.
Add flour to fat remaining in skillet and blend, add boullion and sour cream gradually, stir and cook until thickened.
Add onion mixture, browned meat, Worcestershire Sauce and mix and heat thoroughly.
Return to casserole.
Bake, uncovered in a preheated 350 degree oven about 30 minutes.
6 servings.

Penn's Version of Her Mom's Version Of the Wisconsin Version

2-5 lbs of Perfect Venison Hunks, Cut into strips
Tamari
3-4 cloves of garlic, chopped
1 Onion, chopped
2-3 lbs of mixed Fresh Mushrooms, Button, Portabellas, Brown Bells...
1 box Organic Chicken Broth
1 box Organic Vegetable Broth
2-4 Handfuls of flour, whole wheat or white
Worcestershire Sauce
1-2 cups Sour Cream

Marinate the venison in Tamari, cover and refrigerate for 1 hour to several days.

In a HUGE cast iron skillet add Grape Seed Oil and heat the pan to high.  
Add venison in one layer to sear. 
Brown the venison strips until the edges are crispy - nice and hot.
Add onion and let sweat a little - don't burn!
Add garlic and toss.
Cook another minute or two.
Add handfuls of flour until everything is coated well.  
Brown the floured covered everything for a minute or so.
Begin to add broth gradually.
Let it bubble between adding the broth.  
Add the mushrooms after the broth is bubbling again.
Cook until the mushrooms release their juice and the pan is bubbling again.

Begin to add sour cream, blend into mixture, let it bubble in between.
Turn the flame down and continue to let simmer while the water heats.

Heat a med. pan of water to a boil.
Add Kluski noodles and cook until tender - 12- 20 minutes. 
Drain.
Smother in Stroganoff.
Serve with Crisp Green Salad
Picture
My little Mom with a plate of Stroganoff - the last one to dish up! (Wulfgar too!)
6 Comments

    Author

    Penn Parmenter is a high altitude gardener, seedswoman and student of the earth.  She is married to Cord Parmenter - an awesome gardener, gorgeous man and a master blacksmith. Together they own and run a sustainable greenhouse design company, Smart Greenhouses LLC and Penn grows seed for her seed business, Miss Penn's Mountain Seeds.  She is a mother of three sons and an outdoorswoman.  Penn forages wild food, hunts big game, fishes, preserves, maintains a huge organic forest garden and occasionally makes dinner.  At home you can find her in her greenhouses as well as in the wilderness - nose to the ground, butt in the air, trying to identify Colorado natives.    

    Archives

    November 2020
    January 2020
    October 2019
    August 2019
    June 2018
    January 2018
    March 2017
    January 2017
    January 2016
    December 2015
    November 2015
    October 2015
    March 2014
    October 2013
    February 2013
    January 2013
    December 2012
    November 2012
    September 2012
    July 2012
    June 2012
    May 2012
    April 2012
    March 2012
    February 2012
    January 2012
    December 2011
    November 2011
    October 2011
    September 2011
    March 2011
    February 2011
    January 2011

    RSS Feed

Proudly powered by Weebly